OBJECTIVES
This assignment has two primary objectives: understanding your meter and depth of field.
1. Learn to get the right amount of exposure in outdoor daylight settings.
2. Learn to use your aperture for depth of field.
LOADING THE CAMERA
Failure to properly load the camera results in totally blank transparent negatives with only frame numbers showing along the edge.
Follow these steps (unless you have a motor drive):
1. Check your film speed and set the camera's ASA.
2. Install the film being sure to attach it to the take-up spool and repeatedly operate the advancing lever (squeezing shutter button as needed) until both top and bottom sprockets are engaged in the film sprocket holes.
3. Close the camera back.
4. IMPORTANT. Turn the crank as the arrow indicates until the film is snug, but do not force it.
5. While watching the crank, advance the film 2 times (squeezing shutter button as needed). If the crank turns, the film is properly moving. If the crank does not turn, open the camera and reattach the film leader and try again. Repeat steps 4 and 5 until it works correctly.
6. After each picture, observe the rewind crank as you advance the film. If turns while you advance the film all is well.
7. At the end of the film, don't force it. The film can break off if forced.
8. If you can keep advancing it forever, cry now. The film was never connected in first place or it broke. Don't rewind or open the camera, in a changing bag to see if the film can be salvaged (feel free to ask for help). Do not touch the fragile shutter or mirror in your camera.
PREPARATION
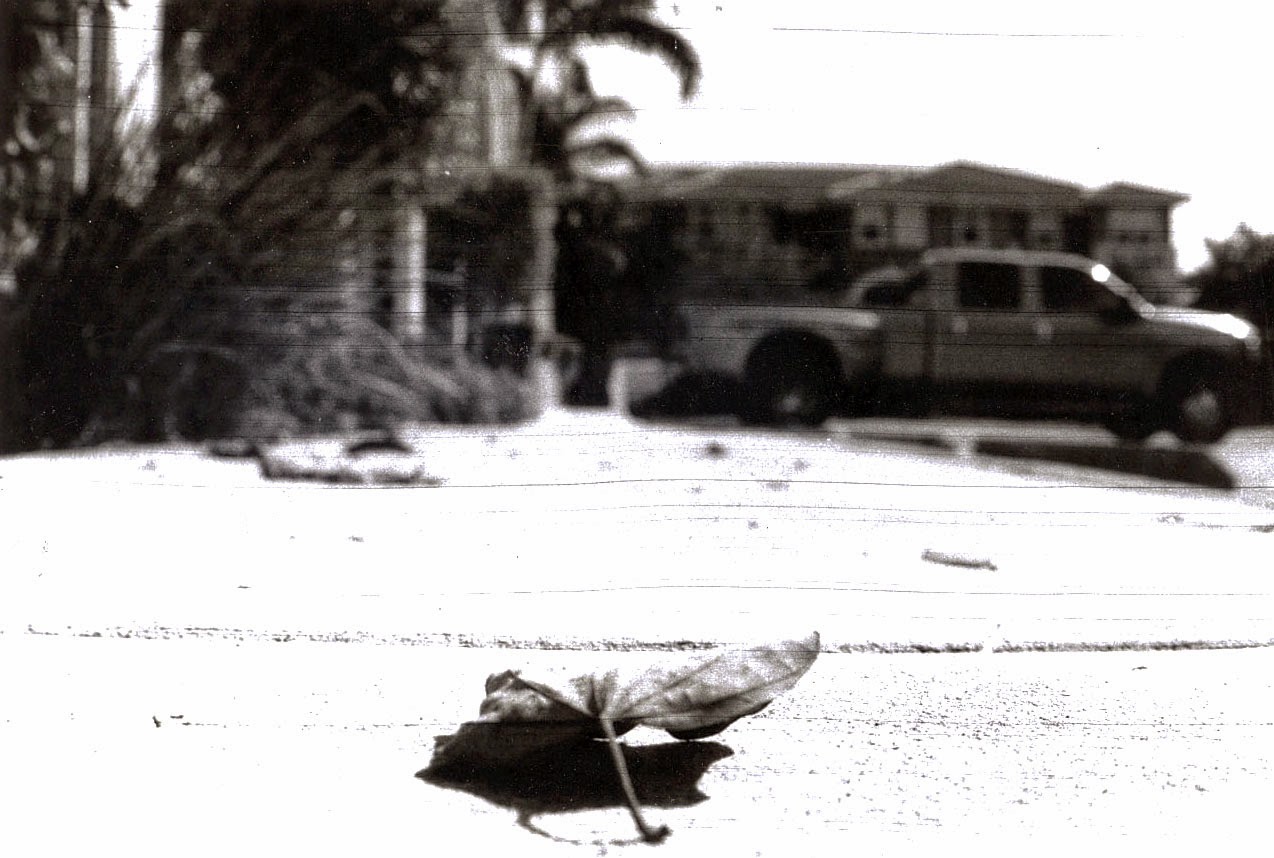
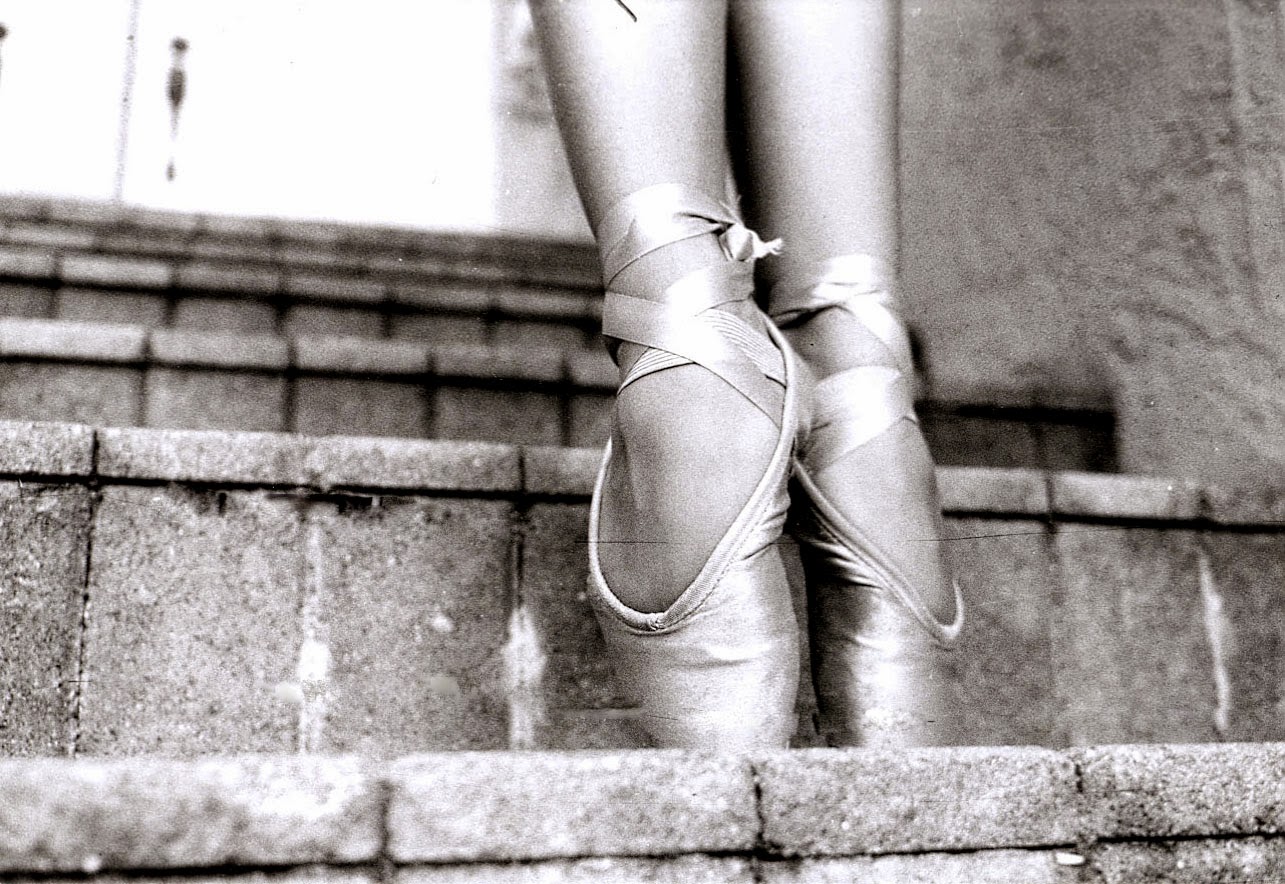
Depth of field determines how much of the image will be in focus from foreground to background. Several things determine this: the smaller the aperture (size, not number, ie: F22 is a very small aperture, F2.8 is a very large one) or the closer you are to the subject, the less depth of field, or overall focus, you will have. Depth of field can be used for artisitic purposes to isolate a subject, or to show an extreme amount of focus.
A good way to go about doing this is to create images that evoke a sense of isolation or alienation, by separating the main subject of the image from the secondary elements of the composition. Think of foreground, middleground and background, being conscious of where you place them in relation to one another in the composition. Another tactic is to set up obstructions in the foreground that force the viewer to make a relationship between foreground and background, or to struggle to see the background through the foreground. Play with the effects of aperture and space, trying the same composition with different apertures (don't forget to take new meter readings when you change aperture, or to use reciprocal exposures).
WHAT TO DO
You are to photograph the same thing two times. For the first shot set the aperture at a small opening (high number, ie f/16 or f/22 or higher), focus on your subject, meter and change your shutter speed according to your meter.
The second shoot
(again of the same thing) set your aperture at a large opening (low number, ie f/5.6 or f/4 or lower), focus on your subject (same spot), meter and change your shutter speed according to your meter. You are to write down your aperture and shutter speed for each shoot.
See the following websites for more examples....
Understanding Depth of Field in Photography
Depth of Field Calculator
Depth of Field
To Blur or not to Blur
Depth of Field Tutorial
EXPOSURE SPEED AND APERTURE (KEEP RECORDS)
The shutter speed for a hand held camera must be as fast as the lens focal length. Otherwise the picture is likely to be blurry due to camera motion. A normal 50 mm lens requires 1/60th of a second or faster when hand-holding the camera (1/60th is shown as a simple 60 on the camera). Wide angle lenses (28 mm or 35 mm) can be sharp at 1/30th of a second. A 100 mm telephoto lens requires 1/125th of a second for a hand-held camera.
Adjust the shutter speed and the aperture according to the light meter's recommendations. Ask about this if you are not certain.
Create a chart in your photography pad. Have the frame number, aperture and shutter speed for each frame.
# Aperture Shutter
1 f/22 60
2 f/11 125
3 f/3.5 1000
4 f/16 60
5 f/8 250
6 f/4 1000
THINGS TO DO AS YOU ARE TAKING THE PICTURES
Look at your notes for creating a good composition. Keep this tips in mind.
· Vertical/horizontal
· Different point of view
· Rule of thirds
· Content/subject
· Get close
· Fill the frame
· Avoid distracting backgrounds
· Leading lines
· Shapes
· Contrast
· Emphasis
· Balance
· Sharpness
PROCESS FILM AND CONTACT PRINT THE NEGS
See appropriate instructions and in-class demonstrations. After processing examine the negatives for exposure and contrast range. Note any irregularities and be sure to find out the reason for them.
Create a contact sheet with your negatives. It is easier to make compositional choices from positive than from negatives. It is better to make exposure choices from the negatives themselves.
Circle or mark at least 5 photos that you feel are your best. Make sure they are marked before turning them to be graded.
PRINTING
Save every test strip and ruined piece of paper used while printing this assignment. We will discuss this during critique. We can often think of ways to cut waste and your cost. A certain amount of waste will always happen. It is not counted against you in the grade, but you pay for the paper.
____ 1. Print 5 prints (5x7 inches). 2 of the prints must the same image, one with shallow DOF and high DOF.
____ 2. Print at least one 8x10 from the negative you like best. Be sure to print a full range of contrast in this print with some white-white and some black-black. Include all possible textural information in all the tonal areas including the light and dark parts of the print. This is the final print for this assignment.
This will be printed after critique.
FEEDBACK
During critique you will be able to discuss the results with the instructor and students in class. Bring all prints, wasted paper, negatives, contacts, shooting record and printing records.